This time we will have a quick look at using MongoDb as a service. The provider we will look at is MongoLab. It takes about 5 minutes to be up and running. Add a couple of minutes and you will have used Postman to do what we have done in the previous articles. Inserting and updating simple document.
Previous articles are:
- Getting started (again) with MongoDb in .Net on Windows
- MongoDb for .Net folks – Choosing a GUI tool and installing as a service
Create an account with MongoLab
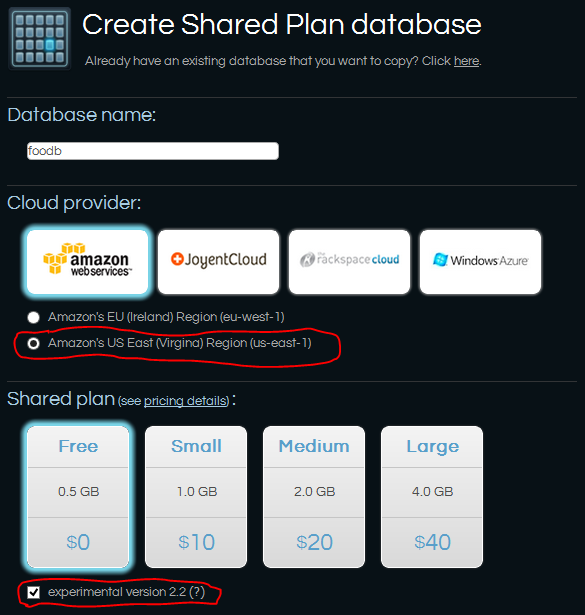
Just head over to MongoLab and create a free account. The process will need you to chose an account name and an username. The next step is to create a database. I wanted to have MongoDb v2.2, and when I created the db, this was only possible if I chosed Amazon and US-east.
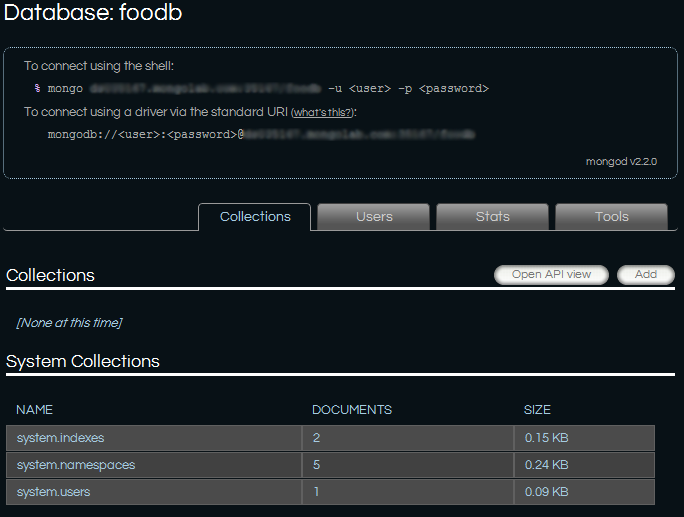
When it’s created, open up the details view for the database by clicking on it in the MongoLab GUI. There you will find detailed info about how to connect to your database.
Use MongoLab’s REST API with Postman
MongoLab has a nice REST API. Lets start playing with it, accomplishing more or less the same thing as we did in the first article. For this I will use Postman, an a extension to Google Chrome. The API-key can be found under the user view. That is the user you selected when you created the account. Look for a link up to the right.
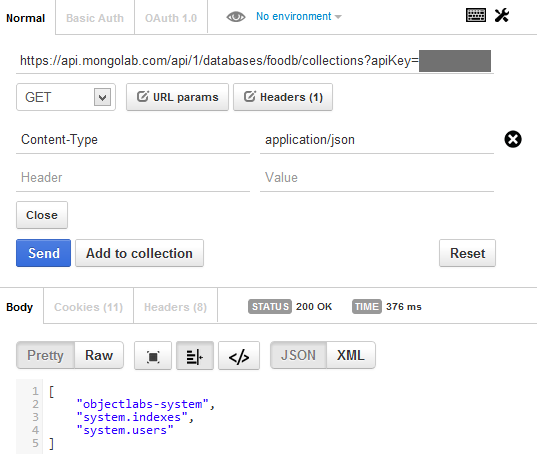
Now, lets do something really simple. Lets inspect what collection exists. Issue a GET against the db to inpect what collections there are:
GET: https://api.mongolab.com/api/1/databases/foodb/collections?apiKey=xxxxxxxxxx
That would look something like this:
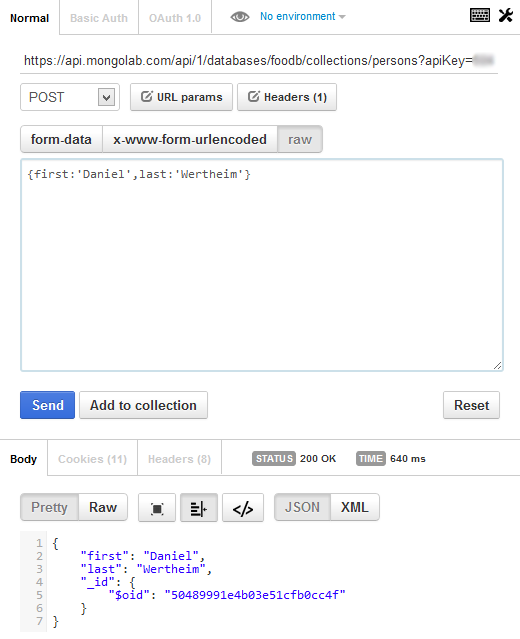
Notice a nice feature with Postman. Each request gets stored in a history so that you can re-execute them. Now lets store a new document. Just POST to an URL defining the collection you want to store the document int. Eg. persons:
POST: https://api.mongolab.com/api/1/databases/foodb/collections/persons?apiKey=xxxxxxxxxx
That’s it! It’s as simple as that. But lets touch on something we haven’t before. In the first article I just added a property age to the document and re-saved it. What I did was pushing the whole document in again. Let’s mess things up and you’ll see what I mean. Let’s try and do the same with the REST API. First lets see if we can get the document back, using the _id:50489991e4b03e51cfb0cc4f of the document:
GET: https://api.mongolab.com/api/1/databases/foodb/collections/persons/50489991e4b03e51cfb0cc4f?apiKey=xxxxxxxxxx
you should see something like this:
{
    "_id": {"$oid": "50489991e4b03e51cfb0cc4f"},
    "first": "Daniel",
    "last": "Wertheim"
}
Lets introduce age. Do a PUT, and pass in { age: 32 }:
PUT: https://api.mongolab.com/api/1/databases/foodb/collections/persons/50489991e4b03e51cfb0cc4f?apiKey=xxxxxxxxxx
Body: { age: 32 }
You will now be presented with a response looking like this:
{
    "_id": {"$oid": "50489991e4b03e51cfb0cc4f"},
    "age": 32
}
Ooops! Away went the rest of the document. Lets restore it. Do a PUT and pass this {first:'Daniel',last:'Wertheim'}. After this PUT, your document should have first and last as properties. Now let’s patch the existing document instead, and extend it with age. We do this by using the $set modifier. There’s a bunch of modifiers. Look in the docs.
PUT: https://api.mongolab.com/api/1/databases/foodb/collections/persons/50489991e4b03e51cfb0cc4f?apiKey=xxxxxxxxxx
Body: { $set: { age: 32 } }
This time the response will look like this:
{
    "_id": {"$oid": "50489991e4b03e51cfb0cc4f"},
    "age": 32,
    "first": "Daniel",
    "last": "Wertheim"
}
This is not an issue with the REST API. The same goes with the console.
Wait, REST you say. That means…
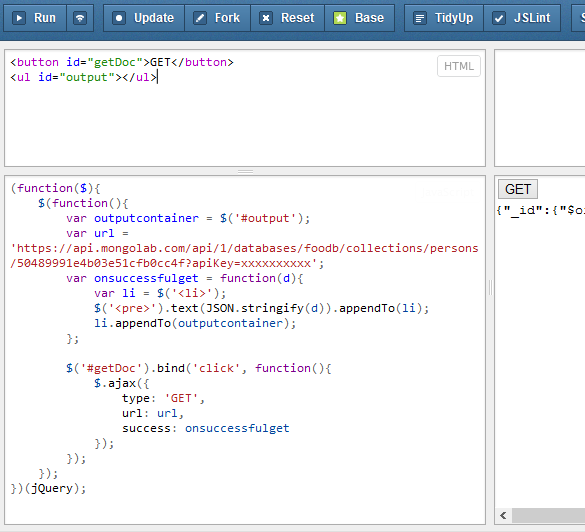
Yes, you can use e.g jQuery do interact with it. Lets have a quick look. There’s a premade jsFiddle for this. Look here. But basically, just use the URL to target the correct resource. Then pick the right http-verb, and when neccessary, provide data. A simple GET for our document would look like this:
(function($){
    $(function(){
        var outputcontainer = $('#output');
        var onsuccessfulget = function(d){
            var li = $('<li>');
            $('<pre>').text(JSON.stringify(d)).appendTo(li);
            li.appendTo(outputcontainer);
        };
        $('#getDoc').bind('click', function(){
            $.ajax({
                type: 'GET',
                url: 'https://api.mongolab.com/api/1/databases/foodb/collections/persons/50489991e4b03e51cfb0cc4f?apiKey=xxxxxxxxxx',
                success: onsuccessfulget
            });
        });
    });
})(jQuery);
There’s also JS-libs that wraps the REST calls. One example is: https://github.com/mattnull/MongoLab.js. Haven’t tried it myself though.
Does MongoLab only support REST?
No of course not. You can connect to it using the C# driver. Lets try the code we wrote in the first article. The only thing you would need to updated is the line where we create the server:
var server = MongoServer.Create("mongodb://myuser:[email protected]:35167/foodb/?safe=true");
A little note. I had an “@” sign in my password. It needs to be encoded. You can use this code for getting the correct URL:
var url = new MongoUrlBuilder("mongodb://ds035167.mongolab.com:35167/foodb/?safe=true")
{
    DefaultCredentials = new MongoCredentials("myuser", "myp@ss")
}.ToMongoUrl();

var server = MongoServer.Create(url);
That’s it. The code shall now work the same.
Summary
This time we have been looking at how easy it is to start using MongoDb as a service. For this we looked at MongoLab and I showed you how easy it is the integrate with their REST API. Next time will be about something else. I’ve promised to look at querying and hopefully I will stand by my word in the next article.
//Daniel

