I was fiddling with securing an ASP.Net WebAPI using IdentityServer3 and I also wanted to use Swagger for documenting the API and therefore needed it to integrate with IdentityServer. I know there's support for OAuth2 in the SwaggerUI....somehow.... but I honestly I stopped trying rather quickly as I saw another solution for getting the SwaggerUI to use IdentityServer to get an access token for use when calling the API from the SwaggerUI. Keep reading and I'll show you how.
My fiddlings with IdentityServer is being kept in this GitHub repository.
Disclaimer
In the spirit of making this guide simpler and "just work", to all you developer gods, I do apologize that I will cut some corners. Truly sorry for this.
Prerequisite 1
You have an IdentityServer installation available to authenticate against. If you need to set one up for local dev/testing purposes, ther's an execellent tutorial for it in the official docs. It takes about 10min to get one up and also to secure an existing ASP.Net WebAPI.
Prerequisite 2
You do need an ASP.Net WebAPI with some controllers that you want to document and interact with using Swagger. The guide mentioned above will not only describe how to get IdentityServer up and running but also describe how to setup an WebAPI using Owin as well.
Swashbuckle
We have an ASP.Net WebAPI with Owin in place. The first step is then to install Swashbuckle which will be used to have an endpoint returning Swagger "data" about an ASP.Net WebAPI.
install-package swashbuckle.core
Then it needs to be enabled/configured, so add this where you bootstrap your API in Startup.cs. My setup for Swashbuckle looks like this:
config.EnableSwagger("docs/{apiVersion}/swagger", c =>
{
    c.SingleApiVersion("v1", "Super duper API");

    var baseDirectory = AppDomain.CurrentDomain.BaseDirectory;
    var fileName = Assembly
        .GetExecutingAssembly()
        .GetName()
        .Name + ".XML";
    var commentsFile = Path.Combine(baseDirectory, "bin", fileName);
    c.IncludeXmlComments(commentsFile);
});
NOTE, I do not use the SwaggerUI via Swashbuckle, so don't enable it using EnableSwaggerUI().
Sample API-Controller
Now, be a good citizen and decorate your controller-actions with attributes and XML-comments, so that a really nice and extensive API documentation can be generated and exposed via SwaggerUI. Don't forget to ensure your XML documentation file will be generated. Enable this under:
Project properties --> Build --> Output --> ...
A sample controller could look like this:
/// <summary>
/// Persons.
/// </summary>
[RoutePrefix("persons")]
[Authorize]
public class PersonsController : ApiController
{
    /// <summary>
    /// Returns some persons.
    /// </summary>
    /// <returns></returns>
    /// <remarks>Things can go wrong</remarks>
    [Route]
    [HttpGet]
    [ResponseType(typeof(Person[]))]
    public HttpResponseMessage Get()
    {
        return Request.CreateResponse(HttpStatusCode.OK, new[]
        {
            new Person
            {
                Name = "Joe the man",
                Score = 1000
            }
        });
    }
}

/// <summary>
/// A person.
/// </summary>
public class Person
{
    /// <summary>
    /// The Name
    /// </summary>
    public string Name { get; set; }
    /// <summary>
    /// The Score
    /// </summary>
    public int Score { get; set; }
}
SwaggerUI
Again, I will not use Swashbuckle to host the SwaggerUI, but instead I just downloaded SwaggerUI from GitHub and included the dist folder directly in my WebAPI as static files (copy & paste). I suppose you could go with Swashbuckle and it's bundled SwaggerUI and inject a custom JavaScript if you like, but I went straight to the source instead. There's a really nice customized open-source version of a SwaggerUI that you could use instead, the steps would still be the same.
I renamed the dist folder to swagger and placed it directly under the root of the API:
[your_apiroot]\swagger
After compile, you should now be able to go to https://localhost:43001/swagger (use your port). In the docs explorer, paste in your route instead: https://localhost:43001/docs/v1/swagger; and you shall now see your docs.
Fix URL
Lets do it somewhat nice by setting a value for your URL. Open [your_apiroot]\swagger\index.html and edit:
url = "http://petstore.swagger.io/v2/swagger.json";
Switch for:
url = window.location.protocol
    + "//"
    + window.location.host
    + "/docs/v1/swagger";
Make use of IdentityServer
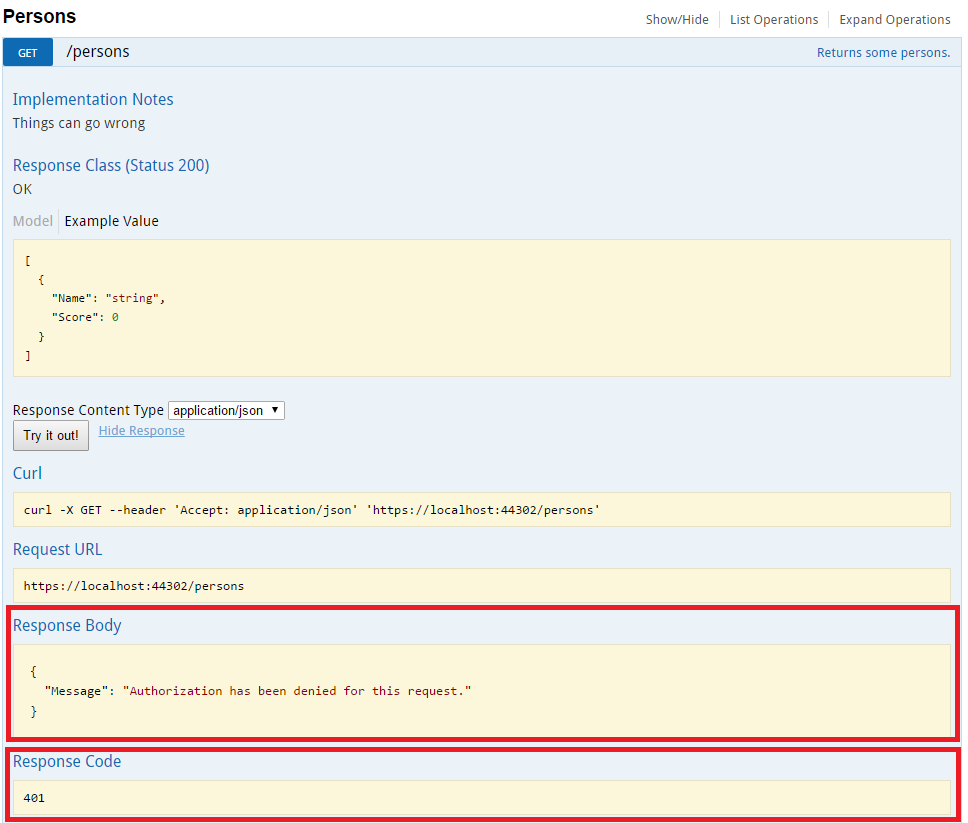
Since your API is secured using IdentityServer and since the controller is marked with e.g. the AuthorizeAttribute, you will not be able to invoke the action using Swagger. If you do, you will get:
{
  "Message": "Authorization has been denied for this request."
}

There's a guide on how to use JavaScript to get an access token from the IdentityServer. We will make use of the JavaScript and some pieces from that guide.
Get this JavaScript lib oidc-token-manager and place it here:
[your_apiroot]\tokenclient\oidc-token-manager.min.js
Then create popup.html next to it:
[your_apiroot]\tokenclient\popup.html
The contents of it:
<!DOCTYPE html>
<html>
<head>
  <title></title>
  <meta charset="utf-8" />
</head>
<body>
  <script type="text/javascript" src="oidc-token-manager.min.js"></script>
  <script type="text/javascript">
    new OidcTokenManager().processTokenPopup();
  </script>
</body>
</html>
Now create a new file:
[your_apiroot]\tokenclient\enabletokenclient.js
This file will be fairly simple. What is does is to use the oidc-token-manager and the popup-flow that it supports, which opens a popup that allows you to sign-in against IdentityServer. It hooks into the Swagger UI by letting you double-click on the textbox where you can enter an API-key.
(function ($, swaggerUi) {
    $(function () {
        var settings = {
            authority: 'https://localhost:44300/identity',
            client_id: 'swashy',
            popup_redirect_uri: window.location.protocol
                + '//'
                + window.location.host
                + '/tokenclient/popup.html',

            response_type: 'id_token token',
            scope: 'openid profile SecuredApi',

            filter_protocol_claims: true
        },
        manager = new OidcTokenManager(settings),
        $inputApiKey = $('#input_apiKey');

        $inputApiKey.on('dblclick', function () {
            manager.openPopupForTokenAsync()
                .then(function () {
                    $inputApiKey.val(manager.access_token).change();
                }, function (error) {
                    console.error(error);
                });
        });
    });
})(jQuery, window.swaggerUi);
By default, the: [your_apiroot]\swagger\index.html file is already set up to use the API-key value from the textbox in theAuthorization-header. But you still need to ensure it uses bearer with the access token provided by the identity server.
So somewhere around line 78, where the apiKeyAuth is built, it should be changed to look like this:
var apiKeyAuth = new SwaggerClient.ApiKeyAuthorization(
    "Authorization",
    "Bearer " + key,
    "header");
Finally
Include the JavaScript files we put under [your_apiroot]\tokenclient\ in the [your_apiroot]\swagger\index.html file, so that it executes after all other JavaScript has been executed in the page.
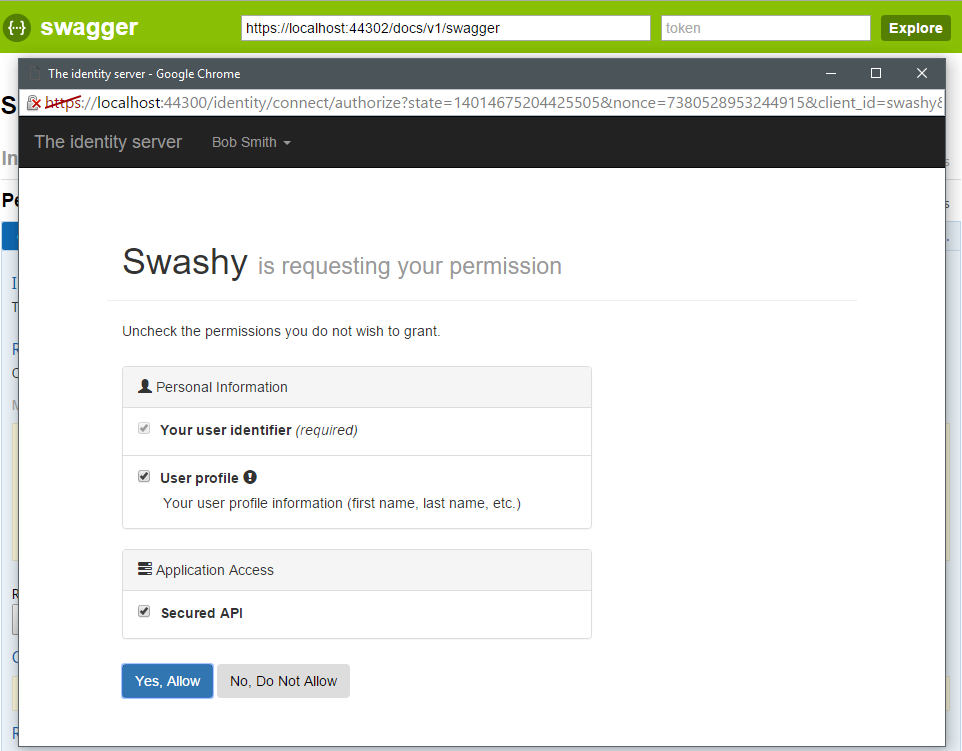
If you refresh the SwaggerUI and double-click the textbox next to the "Explore" button, you should be prompted with a sign-in popup, and when done, your SwaggerUI can call your secured API.

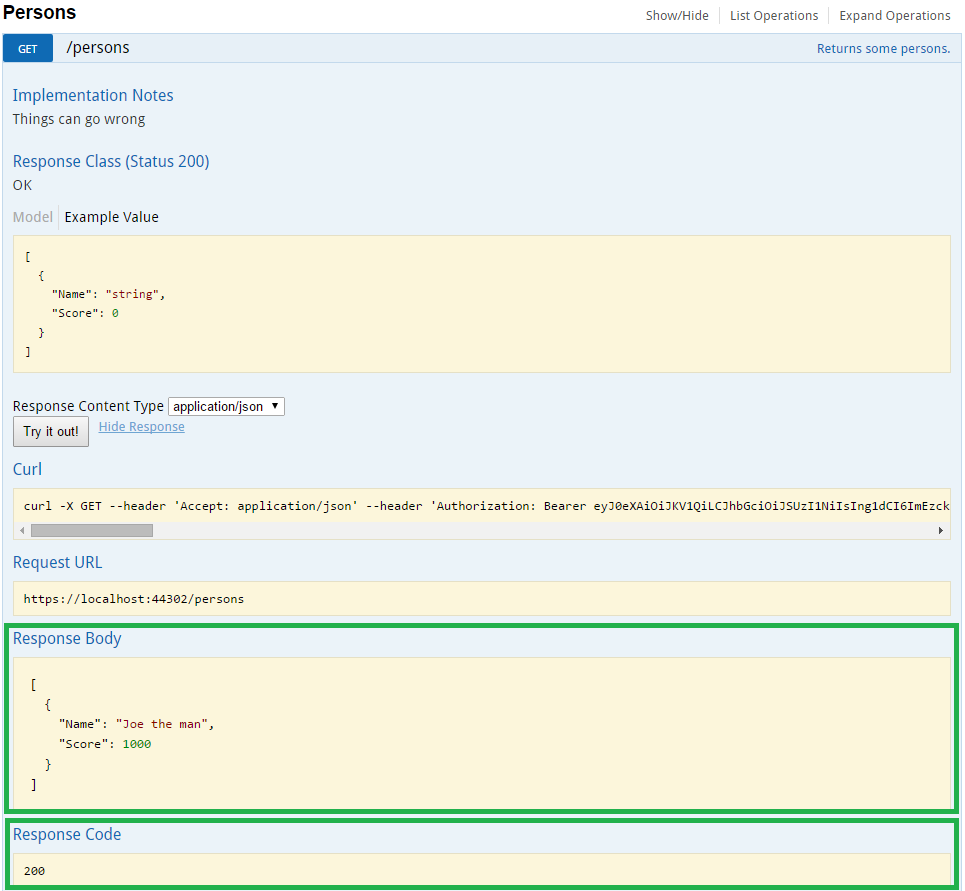
When allowed the token will be filled into the textbox and will be used in further call against your API.

So now, if you perform a request, it will succeed.

//Daniel
