
Instead of setting up multiple realms or multiple client registrations, you can make use of a single realm and a single client registration and still easily support multi tenancy using Keycloak. It will be more secure to have e.g. isolated realms, as users then are separated, but I'm building a simple app that will have a single install and single configured client app and data store and in need for supporting a user to belong to multiple tenants. This is what this post is about. It's only four steps.
Steps
- Add User attributes using a key-convention.
- Add a Client scope that will represent tenants.
- Add a mapper to extract the User attributes.
- Add Client scope to the Client in use.
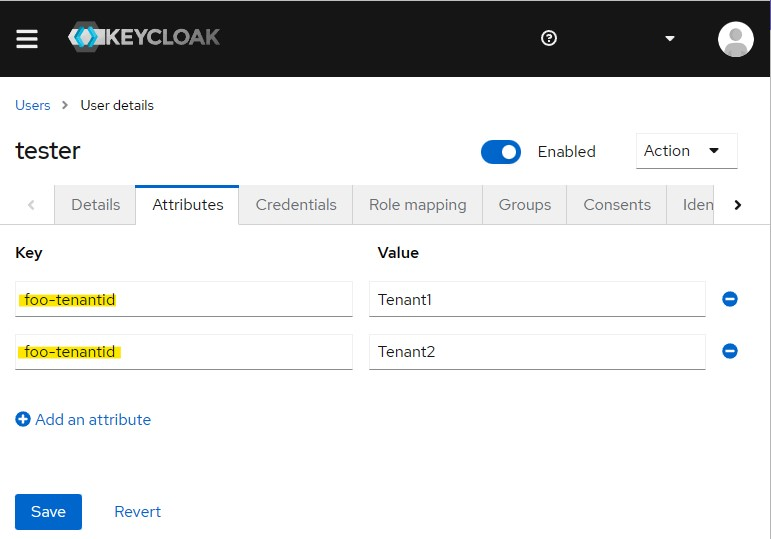
Step 1 - Add User attributes using a key-convention
You are probably using Keycloaks API for this via an integration, but for ease, I'll use the Keycloak GUI.
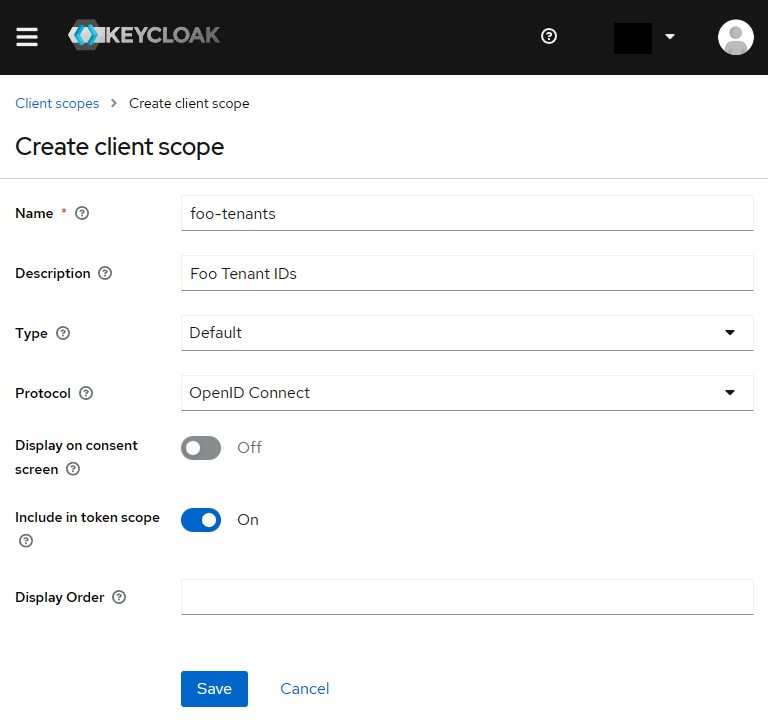
Step 2 - Add a Client scope that will represent tenants
Create a new Client scope with naming of your choice. I usually add a short prefix for the app, e.g. "foo-"
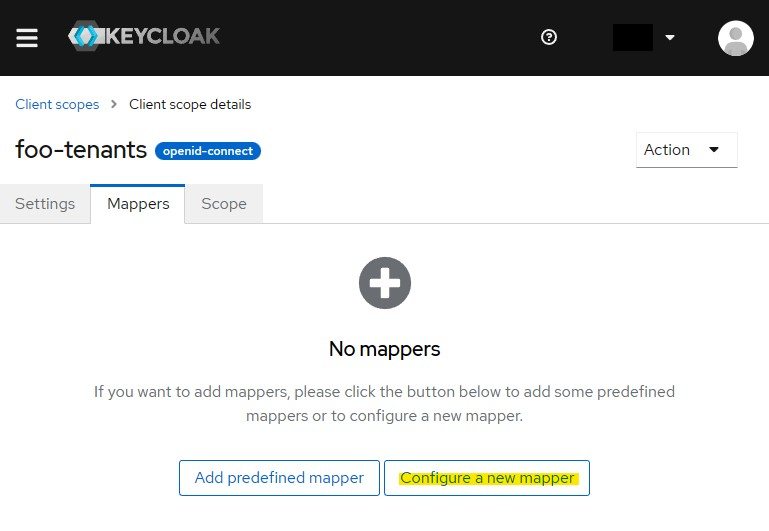
Step 3 - Add a mapper to extract the User attributes
Now we need to add contents to our created Client scope. We will do this by configuring a new mapper.
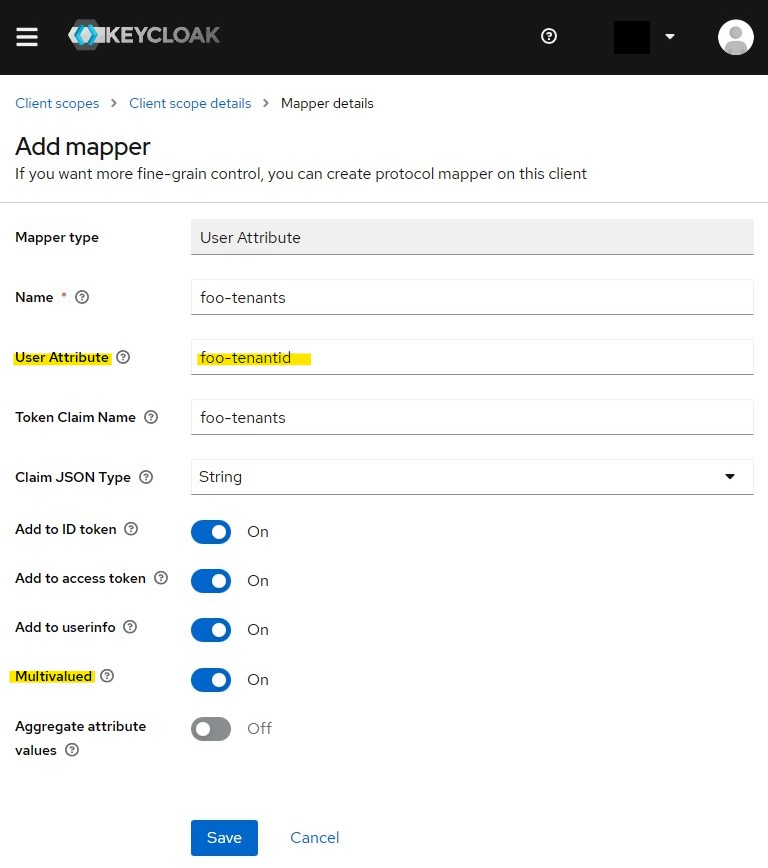
Select an "User attribute" mapper.

Configure the user attribute to extract from the user account and if you have the same case as I do, in the need of belonging to multiple tenants, ensure it's multivalued.
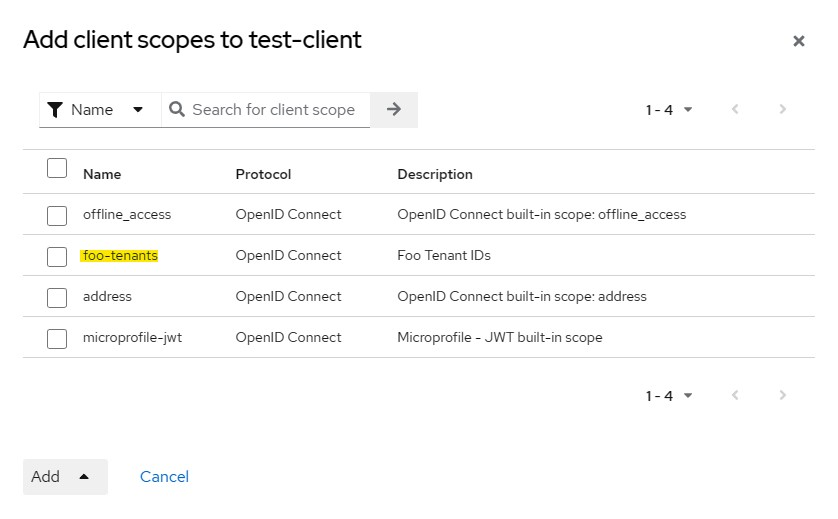
Step 4 - Add Client scope to the Client in use
The final step is to register the newly created Client scope with your client.
The Result
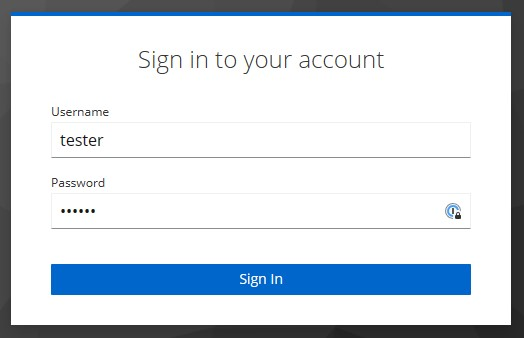
Login with the user and look at the scopes for the access token.
The mapped scope is now present in the parsed token:
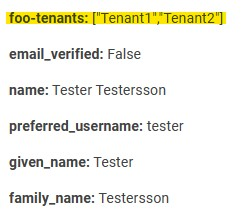
foo-tenants: ["Tenant1", "Tenant2"]
email_verified: false
name: Tester Testersson
preferred_username: tester
given_name: Tester
family_name: Testersson
That's it. Happy coding!
//Daniel